Here is an eye catching and bold design which is extremely simple to do at the same time.
To do this, all you have to do is draw straight lines. Pretty simple, right?
A steady hand and control is needed but this can be easily achieved by using a good, fine tipped nail art brush.
On a white background, the stripes really stand out and it also gives the effect of making your nails seem longer than they really are!
Have a go and put your own twist on it, maybe by doing stripes in different directions?
I hope you enjoyed this,
Noshin ♥
Thursday, 20 June 2013
Aztec!
Hiya, so here are some aztec-style patterns I've done using nail art pens.
The main colour used is Mint Green by Barry M, black by LA Colors, a gold and white by Beauty UK.
I hope you like it,
Noshin ♥
Saturday, 23 March 2013
Rawr! Traditional Tiger...
This is a really easy but bold nail design that is super quick and can be done in two simple steps:
The products I used are:
-Charlie Nail Enamel in Orange (this came in a Charlie Revlon Essence gift set and I don't think they sell them separately)
-LA Colours Nail Laquer in Black
So, first of all, paint all your nails orange:

Then, take your black art brush and free handedly paint on stripes from the sides of your nail. A really fine art brish creates the best effect. Flick them as you reach the end of the stripe to create that fine point.

And that's it!
This nail design is very popular and there are many different takes on this...such as using different colours or creating an ombre effect with white like Rihanna....

Have fun trying out this design!
Noshin ♥
The products I used are:
-Charlie Nail Enamel in Orange (this came in a Charlie Revlon Essence gift set and I don't think they sell them separately)
-LA Colours Nail Laquer in Black
So, first of all, paint all your nails orange:
Then, take your black art brush and free handedly paint on stripes from the sides of your nail. A really fine art brish creates the best effect. Flick them as you reach the end of the stripe to create that fine point.
And that's it!
This nail design is very popular and there are many different takes on this...such as using different colours or creating an ombre effect with white like Rihanna....

Have fun trying out this design!
Noshin ♥
Saturday, 9 March 2013
Pink sparkle and bow
Today, I am going to share with you this super cute and girly nail design. It's really bright and eye catching with some subtle details, so let's get started....
Products used:
-C200 Hot Looks in Hoola Hoop (click to buy)
-Chit Chat Pink Glitter
-LA Colors Black art lacquer
-2 small gems, glue, applicator stick

First, you simply want to paint your all your nails in a vibrant pink colour. I used Collection 2000 Hot Looks in 34 Hoola Hoop. The really good thing about this is that you get quite an intense colour in just one coat and it also dries within 60 seconds so you can quickly move on to the next stage. They're only £1.99 aswell!

Next, I used the LA Colors Art Lacquer in Black and drew a bow in the corner of my thumb nail. It has a really fine brush so you can draw it very precisely. Follow the outline shown below and fill it in.
As shown in the 4th stage, draw a curved line from the side of the bow to the end of your nail so it seems as if the bow is tied on.

Once that has dried, take one of your gems and glue in the centre of your bow. The size of the gem depends on the size of the bow. Make sure it is small enough so that it doesn't cover the shape of the bow. I found that using an applicator stick helped a lot rather than using my fingers to pick it up.
The last bit of detail I added to this design is the pink glitter from Chit Chat. I applied this on my ring finger nail and this just gave the look a bit of a sparkle and added something irregular against the other plain nails.


And that's all! Here is the finished nail design.
I hope you enjoy this and please let me know what you think :)
Noshin ♥
-C200 Hot Looks in Hoola Hoop (click to buy)
-Chit Chat Pink Glitter
-LA Colors Black art lacquer
-2 small gems, glue, applicator stick
First, you simply want to paint your all your nails in a vibrant pink colour. I used Collection 2000 Hot Looks in 34 Hoola Hoop. The really good thing about this is that you get quite an intense colour in just one coat and it also dries within 60 seconds so you can quickly move on to the next stage. They're only £1.99 aswell!

Next, I used the LA Colors Art Lacquer in Black and drew a bow in the corner of my thumb nail. It has a really fine brush so you can draw it very precisely. Follow the outline shown below and fill it in.
As shown in the 4th stage, draw a curved line from the side of the bow to the end of your nail so it seems as if the bow is tied on.

Once that has dried, take one of your gems and glue in the centre of your bow. The size of the gem depends on the size of the bow. Make sure it is small enough so that it doesn't cover the shape of the bow. I found that using an applicator stick helped a lot rather than using my fingers to pick it up.
![]() |
| I used little, circular, light blue gems |
| close up of the complete bow detail |
The last bit of detail I added to this design is the pink glitter from Chit Chat. I applied this on my ring finger nail and this just gave the look a bit of a sparkle and added something irregular against the other plain nails.
And that's all! Here is the finished nail design.
I hope you enjoy this and please let me know what you think :)
Noshin ♥
Monday, 4 March 2013
Feather Nail Polishes
FEATHER NAIL POLISHES!
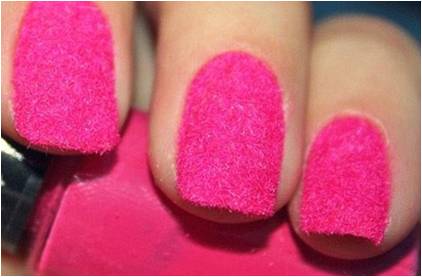
The latest nail trend set by NailsInc is their feather nail polish collection. At £12, these tiny feather-like particles create a soft and furry textured finish (as modelled by Poppy Delevigne below)
![]() |
| Poppy Delevigne |
![]() |
| Nail Inc Bling it on - Feathers |
Although I think they're not very practical for every day life wear and they won't last long, they are amazing for special events seeing as they are so different and leave such a beautiful touch.
![]() |
| Blake Lively's wedding nails |
- Cornwall Feathers - light and dark shades of blue
- Edinburgh Feathers - a mix of blue of orange feathers
- Chester Feathers - jade green with orange/yellow
- York Feathers - tones of orange
The packaging is really cute too with the corresponding birds on the lid of each bottle and faint feathers marked in the background of the metal...
![]() |
| The feather range |
Noshin ♥
Saturday, 2 February 2013
Easy French Manicure
So for my first post ever, I decided that I would start off with something easy and simple and what's more perfect than to begin with the french manicure! This is something that that can be worn on all occasions and leaves your nails feeling ever so clean and smart. So, lets begin....
I used Beauty UK's French Manicure Set which is available from http://www.beautyukcosmetics.com/products/nails/french-manicure-pack. I love using this because it provides you with 3 great colours which are a good quality without it being expensive at all. Contains:
1) Clear base/top coat
2) Pink colour
3) White tip colour
Making sure your nails have been filed and prepped, apply the clear base coat.
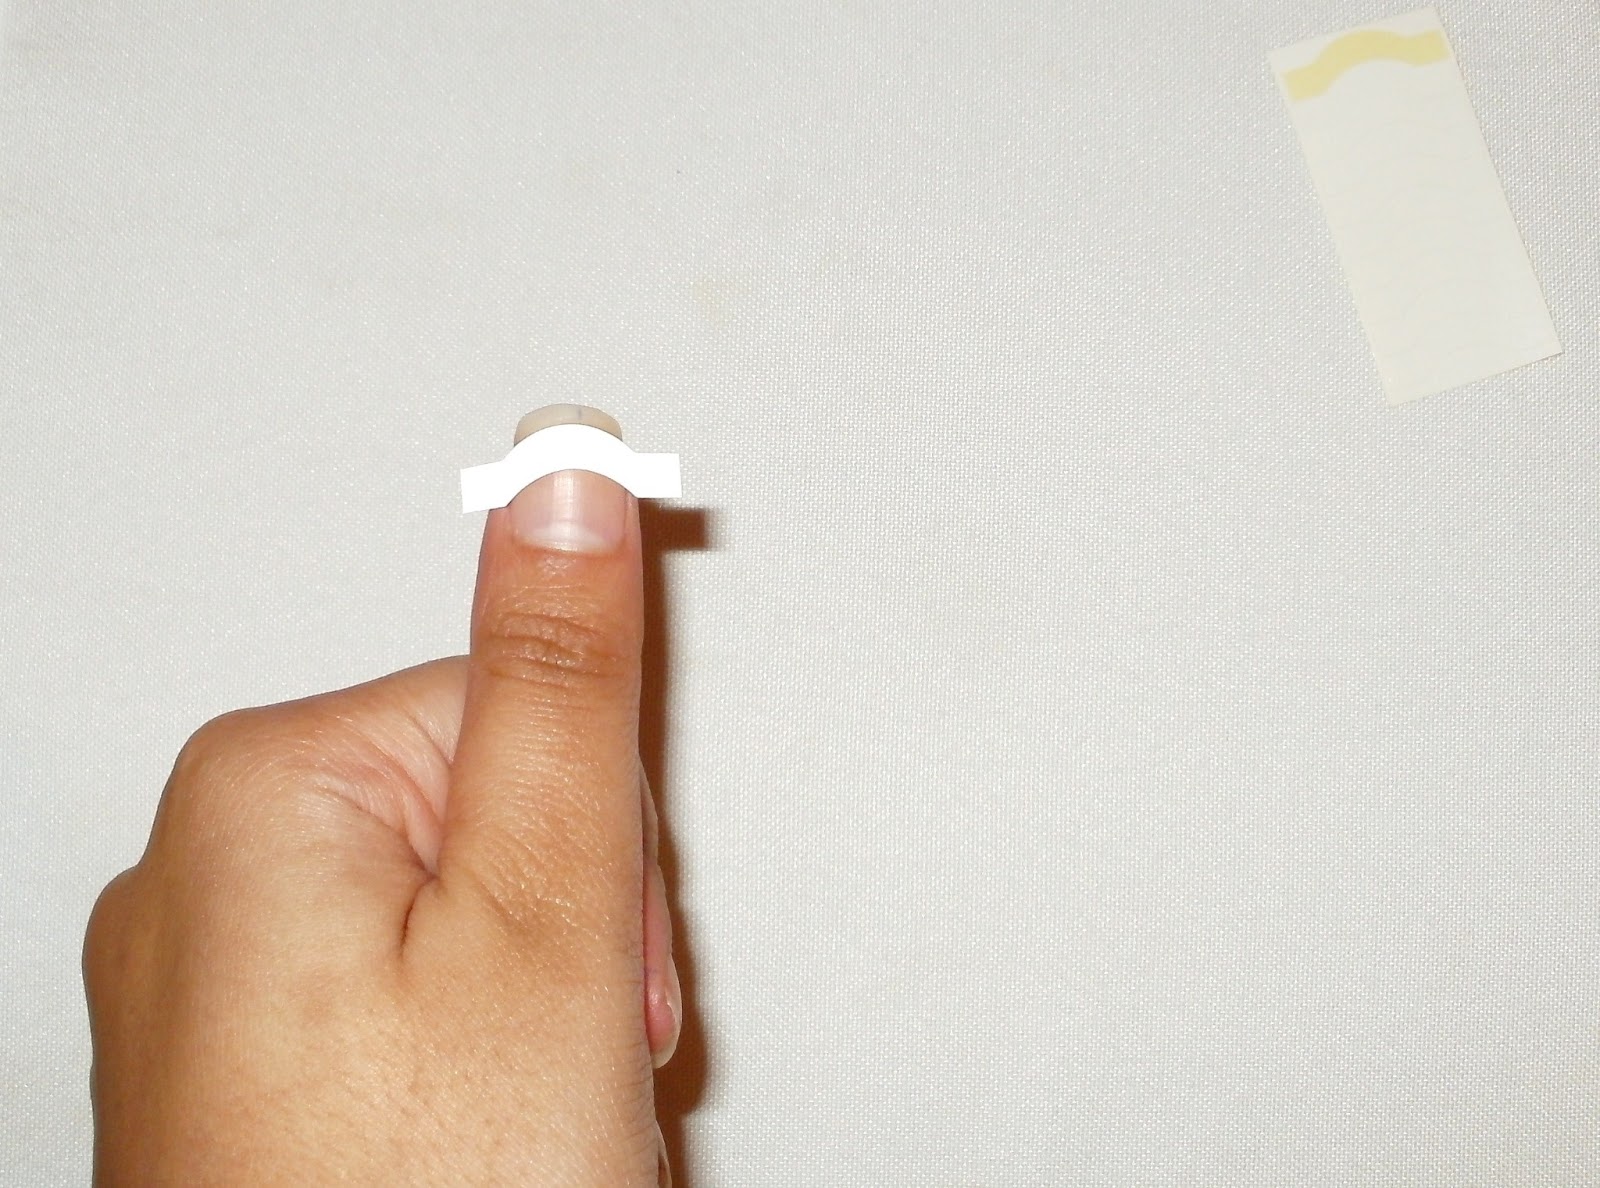
Most sets include nail guide stickers, but this one doesn't so you can purchase them for a small price at most nail salons or drugstores. You simply peel off a strip and stick it your nail where you would like the white tip to start, like so:
Once the sticker is in place, take the white tip and apply this carefully. Wait for it to dry a bit and then peel the sticker off or you will smudge the nail polish while taking the guide off. You should be left with a neat white tip. Any imperfections can be cleared up with a q-tip dipped in remover.
I used Beauty UK's French Manicure Set which is available from http://www.beautyukcosmetics.com/products/nails/french-manicure-pack. I love using this because it provides you with 3 great colours which are a good quality without it being expensive at all. Contains:
1) Clear base/top coat
2) Pink colour
3) White tip colour
Making sure your nails have been filed and prepped, apply the clear base coat.
Most sets include nail guide stickers, but this one doesn't so you can purchase them for a small price at most nail salons or drugstores. You simply peel off a strip and stick it your nail where you would like the white tip to start, like so:
| application of nail guide |
| nail sticker guides |
Then, apply the pink nail polish all over the nail. This makes the nail look more healthy and softens the bright white tip a little to a more natural look. Allow this to dry and then finish off with the clear top coat. This will help seal the nail together. Repeat this on all fingernails on both hands. For a more glam look, you can also add rhinestones in the top corner or elegant floral tattoos. Remember to take your time and enjoy as it is actually very relaxing!
Noshin ♥
| The finished look! |
Subscribe to:
Posts (Atom)