Search This Blog

Thursday 26 December 2013

Diagonal polka dot nail art

This was from a while ago, but I had to do something smart on my nails for a formal event and didn't want any bright colours on my nails so I made up this design.

I separated my nails diagonally and painted them with two contrasting colours - a black and a light grey. The black I used was by Barry M and the grey was called 'Angel Wings' by Collection.
I then used a dotting tool to print dots along the diagonal lines with the alternate colour on each sides - so on the black side I used grey dots and for the grey side I used black dots.
This is what the finished look looked like...


I also found that from a distance, the dotting effect made it seem like the grey blended into the black and looked almost like a gradation. It looks really effective and didn't take long to do. 
You don't have to stick to these colours, you can use whatever you like to make it look more fun but I think contrasting colours work best.
Try it yourself ♥

Monday 23 December 2013

Bandage dress inspired nail art

So, I came across this really pretty shade called 'Milkshake' by Collection. It's a lovely, light pink dusty colour and I thought it'd make a nice base to do a contrasting nail design with.
I thought up of this design and it's where you basically have to draw lots of straight lines in different directions so that they look they are over and under lapping each other. This is similar to what the material is like in bandage dresses as they have to be wrapped around the body. I actually found this picture after I did my nails like this but the top part of the dress is nearly exactly the effect I had recreated on my nails....

I used a fine nail art pen (LA Colours) so that I could create these steady lines. 
This is what the finished design looked like:


These really stand out and I got a lot of compliments. I was also told they look quite tribal which I think is good as that's a big trend at the moment. 
They did take me a while to do, especially on my left hand but I definitely think it paid off. 

I hope you have a go and let me know what you think ♥


Sunday 22 December 2013

Tiger print nail wraps

I rarely use wraps, but I had these lying around so I thought I'd use them. They're these glitter textured tiger print nail wraps which are really easy to apply. 

First, you select a suitable size and stick it on your nail. Then, you get a hairdryer and blow heat over the nail to melt the glue onto your nail. Let it cool and file off the excess. You can also apply a bit of top coat on the tip of your nail to secure them and so they don't chip. I wouldn't advise putting a top coat over the whole nail as that will ruin the textured effect. 

This is what they look like:
 

These lasted me a little longer than a whole week which i think is pretty good. There's loads of different designs you can try and they're great if you don't have time to do your nails yourself.
Thanks for reading ♥

Sunday 6 October 2013

Galaxy Nails!

I have really wanted to try out the ombre technique on my nails for ages which is basically when you blend two or more colours to get a gradation effect. So, I thought I'd do this to achieve a galaxy/cosmic style look.

The nail varnishes I used ranged from a really dark green to a royal blue to a deep purple. I blended them together in a vertical manner but I guess you could even do this in a swirly style to make it seem more like galaxy.


The products I used were:
-Collection Hot Looks in '24 Shameless'
-Sally Hansen HD in '18 DVD'
-Collection Lasting Colour in '6 Purple Rain'


Although I used shimmery nail varnishes, I added on a thin coat of gold glitter just to make it extra sparkly. The nails will be quite rough from the blending so you have to put on a good layer of clear top coat. It can also get quite messy so I found it helpful to clean up the edges of my nails with a cotton bud stick dipped in nail polish remover.
This is what it looked like at the end....


Noshin ♥

Saturday 5 October 2013

More henna....

I thought I might as well upload some of the other henna designs I have done in the past for fun, so here they are...


Twirling floral arm design

I did all of these myself and these are all my own photographs that I took.

Noshin ♥

Henna Hands

This isn't directly nail art related, but I just thought I'd share some of the henna/mehndi designs I did for last Eid. This was a month ago, but there is another Eid coming up in a few weeks so this feels like the right time to upload these so you can take a look at some of the styles and get practicing if you want to have a go! Remember that henna isn't just for Eid, but it is commonly used in other festivals and celebrations like wedding, Diwali or just for fun :)

So, the first one is quite a complex design. because it has very intricate details and needs to be drawn exact to get it to look right. It is very bold, traditional Arabian design and these mandala styles look best featured in the palm of your hands. I did this on my own hand so I could only do it on my left hand.

This is what it looked like immediately after I washed it off. I looks bright red but this was down to the artificial lighting. It was in fact a deep brown colour and it darkened as the days went by.
The next design is one I did on the back of my left hand. It is a really elegant design with paisleys running up the middle finger from the wrist and it's slightly simpler to do too. 


\The last design I'm going to share is one that I did on my little sister and this was a design that I actually made up myself by sketching it out on paper first. I included things she likes in henna like lots of swirls and flowers and I even drew on a bow on the wrist.


I have seen lots of nail art designs inspired by henna and henna itself can even be used on nails. It is a really fun thing to do so i really recommend giving it a go!

Noshin ♥

Sunday 22 September 2013

Cutex Moisture Guard Nail Polish Remover

So this isn't a nail design, but I thought I'd mention this nail polish remover that I've been using recently. Its the Cutex Moisture Guard and it is really good for brittle, dry nails. My nails tend to snap quite easily but after using this, I'd found a slight difference in how healthier and moisturised they were.
This also has a nail whitening formula as well which I couldn't really notice on my nails as they are quite white anyway but I'd really recommend this anyway.
The pricing isn't too bad either - I bought the small 100ml bottle for £1.82 from my local pharmacy but I'm pretty sure you can get the 200ml for cheaper.


There are also different ones worth a try in their range for different nail types like specifically 'Strengthening' for weak nails, 'Ultra Cleansing' for natural nails and more.

Noshin ♥

Friday 20 September 2013

Show Off

I bought this nail polish by Collection a while ago and I forgot how much I loved this colour. It's from their Hot Looks range and it's in the colour 23 Show Off. This is a really gorgeous metallic blue. I love these nail polished because they have a nicely sized brush, they're always really pigmented so one coat is enough, they're really cheap and they dry in 60 seconds!

The nail art I did with this, is kind of aztec-style. As you can see below, I added different kinds of black and gold detail:


Try it yourself and let me know what you think,

Noshin ♥

Notebook Nails

So this can basically be done by painting a white base coat and then adding blue horizontal stripes to be the lined paper and a red vertical stripe for the margin. You can then add some doodling as you would on a notebook. I did mine in black, but you can use any colour. 

You could just leave is like this for a 'sailor' style

As you can see, on each nail I wrote my name, a question mark, a star, a heart and a smiley face :)
Its a bit late now but these nails would also be good for back to school. 
Thanks for reading,

Noshin ♥

Thursday 20 June 2013

Nautical Nails

Here is an eye catching and bold design which is extremely simple to do at the same time.
To do this, all you have to do is draw straight lines. Pretty simple, right?

A steady hand and control is needed but this can be easily achieved by using a good, fine tipped nail art brush.
On a white background, the stripes really stand out and it also gives the effect of making your nails seem longer than they really are!

Have a go and put your own twist on it, maybe by doing stripes in different directions?

I hope you enjoyed this,
Noshin ♥

Aztec!

Hiya, so here are some aztec-style patterns I've done using nail art pens.
The main colour used is Mint Green by Barry M, black by LA Colors, a gold and white by Beauty UK.


I hope you like it,
Noshin ♥

Saturday 23 March 2013

Rawr! Traditional Tiger...

This is a really easy but bold nail design that is super quick and can be done in two simple steps:

The products I used are:
-Charlie Nail Enamel in Orange (this came in a Charlie Revlon Essence gift set and I don't think they sell them separately)
-LA Colours Nail Laquer in Black

So, first of all, paint all your nails orange:


Then, take your black art brush and free handedly paint on stripes from the sides of your nail. A really fine art brish creates the best effect. Flick them as you reach the end of the stripe to create that fine point.


And that's it!

This nail design is very popular and there are many different takes on this...such as using different colours or creating an ombre effect with white like Rihanna....


Have fun trying out this design!
Noshin ♥

Saturday 9 March 2013

Pink sparkle and bow

Today, I am going to share with you this super cute and girly nail design. It's really bright and eye catching with some subtle details, so let's get started....

Products used:
-C200 Hot Looks in Hoola Hoop (click to buy)
-Chit Chat Pink Glitter
-LA Colors Black art lacquer 
-2 small gems, glue, applicator stick


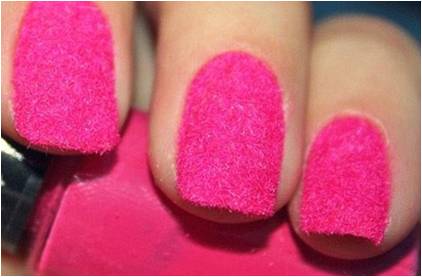
First, you simply want to paint your all your nails in a vibrant pink colour. I used Collection 2000 Hot Looks in 34 Hoola Hoop. The really good thing about this is that you get quite an intense colour in just one coat and it also dries within 60 seconds so you can quickly move on to the next stage. They're only £1.99 aswell!


Next, I used the LA Colors Art Lacquer in Black and drew a bow in the corner of my thumb nail. It has a really fine brush so you can draw it very precisely. Follow the outline shown below and fill it in.
As shown in the 4th stage, draw a curved line from the side of the bow to the end of your nail so it seems as if the bow is tied on.


Once that has dried, take one of your gems and glue in the centre of your bow. The size of the gem depends on the size of the bow. Make sure it is small enough so that it doesn't cover the shape of the bow. I found that using an applicator stick helped a lot rather than using my fingers to pick it up.
I used  little, circular, light blue gems
close up of the complete bow detail

The last bit of detail I added to this design is the pink glitter from Chit Chat. I applied this on my ring finger nail and this just gave the look a bit of a sparkle and added something irregular against the other plain nails.


And that's all! Here is the finished nail design.

I hope you enjoy this and please let me know what you think :)

Noshin ♥

Monday 4 March 2013

Feather Nail Polishes


FEATHER NAIL POLISHES!
The latest nail trend set by NailsInc is their feather nail polish collection. At £12, these tiny feather-like particles create a soft and furry textured finish (as modelled by Poppy Delevigne below)
Poppy Delevigne

Nail Inc Bling it on - Feathers


Although I think they're not very practical for every day life wear and they won't last long, they are amazing for special events seeing as they are so different and leave such a beautiful touch.
Blake Lively's wedding nails
Nails Inc have their feather polishes in four colours so far:

  • Cornwall Feathers - light and dark shades of blue
  • Edinburgh Feathers - a mix of blue of orange feathers
  • Chester Feathers - jade green with orange/yellow
  • York Feathers - tones of orange
The packaging is really cute too with the corresponding birds on the lid of each bottle and faint feathers marked in the background of the metal...


The feather range
I am really excited to try these and I love the new play with textures, let me know what you think!

Noshin ♥